Discover the artistry of embroidery with the multi needle embroidery machine, a marvel of modern textile creation. This innovative machine redefines creativity, allowing enthusiasts and professionals alike to bring their designs to life with unparalleled precision and speed. With its multiple needles, this machine offers the ability to embroider intricate patterns, vibrant colors, and intricate details with remarkable efficiency.
Imagine the freedom to express your creativity on a wide range of fabrics, from delicate silks to sturdy denims, all with the ease and finesse of this advanced technology. Whether you’re embellishing garments, personalizing accessories, or adding flair to home designning with decoration styles, the multi needle embroidery machine empowers you to explore endless design possibilities.
Its intuitive controls and versatile features make it a joy to use, providing a seamless embroidery experience. From seamless pattern integration to swift color changes, this machine ensures that your creative vision is effortlessly translated onto fabric.
Designed to meet the demands of both hobbyists and professionals, this machine is a game-changer in the world of embroidery, offering unmatched speed, precision, and reliability. Embrace the future of embroidery as you unlock a world of design potential with the multi needle embroidery machine, where each stitch tells a story and every creation is a masterpiece.
In essence, this innovative machine is more than just a tool; it’s a gateway to a realm of limitless artistic expression, where imagination knows no bounds, and every stitch is a brushstroke in the tapestry of your creativity.
How Multi Needle Embroidery Machine Operates Uniquely
In this guide, we will explore the operation of Multi Needle embroidery machine in detail, providing you with a step-by-step walkthrough of the process. By the end, you will have a solid understanding of how to operate these machines and create stunning embroidered designs. For more information, visit here.
Table of Contents
Section 1: Understanding Multi Needle Embroidery Machine
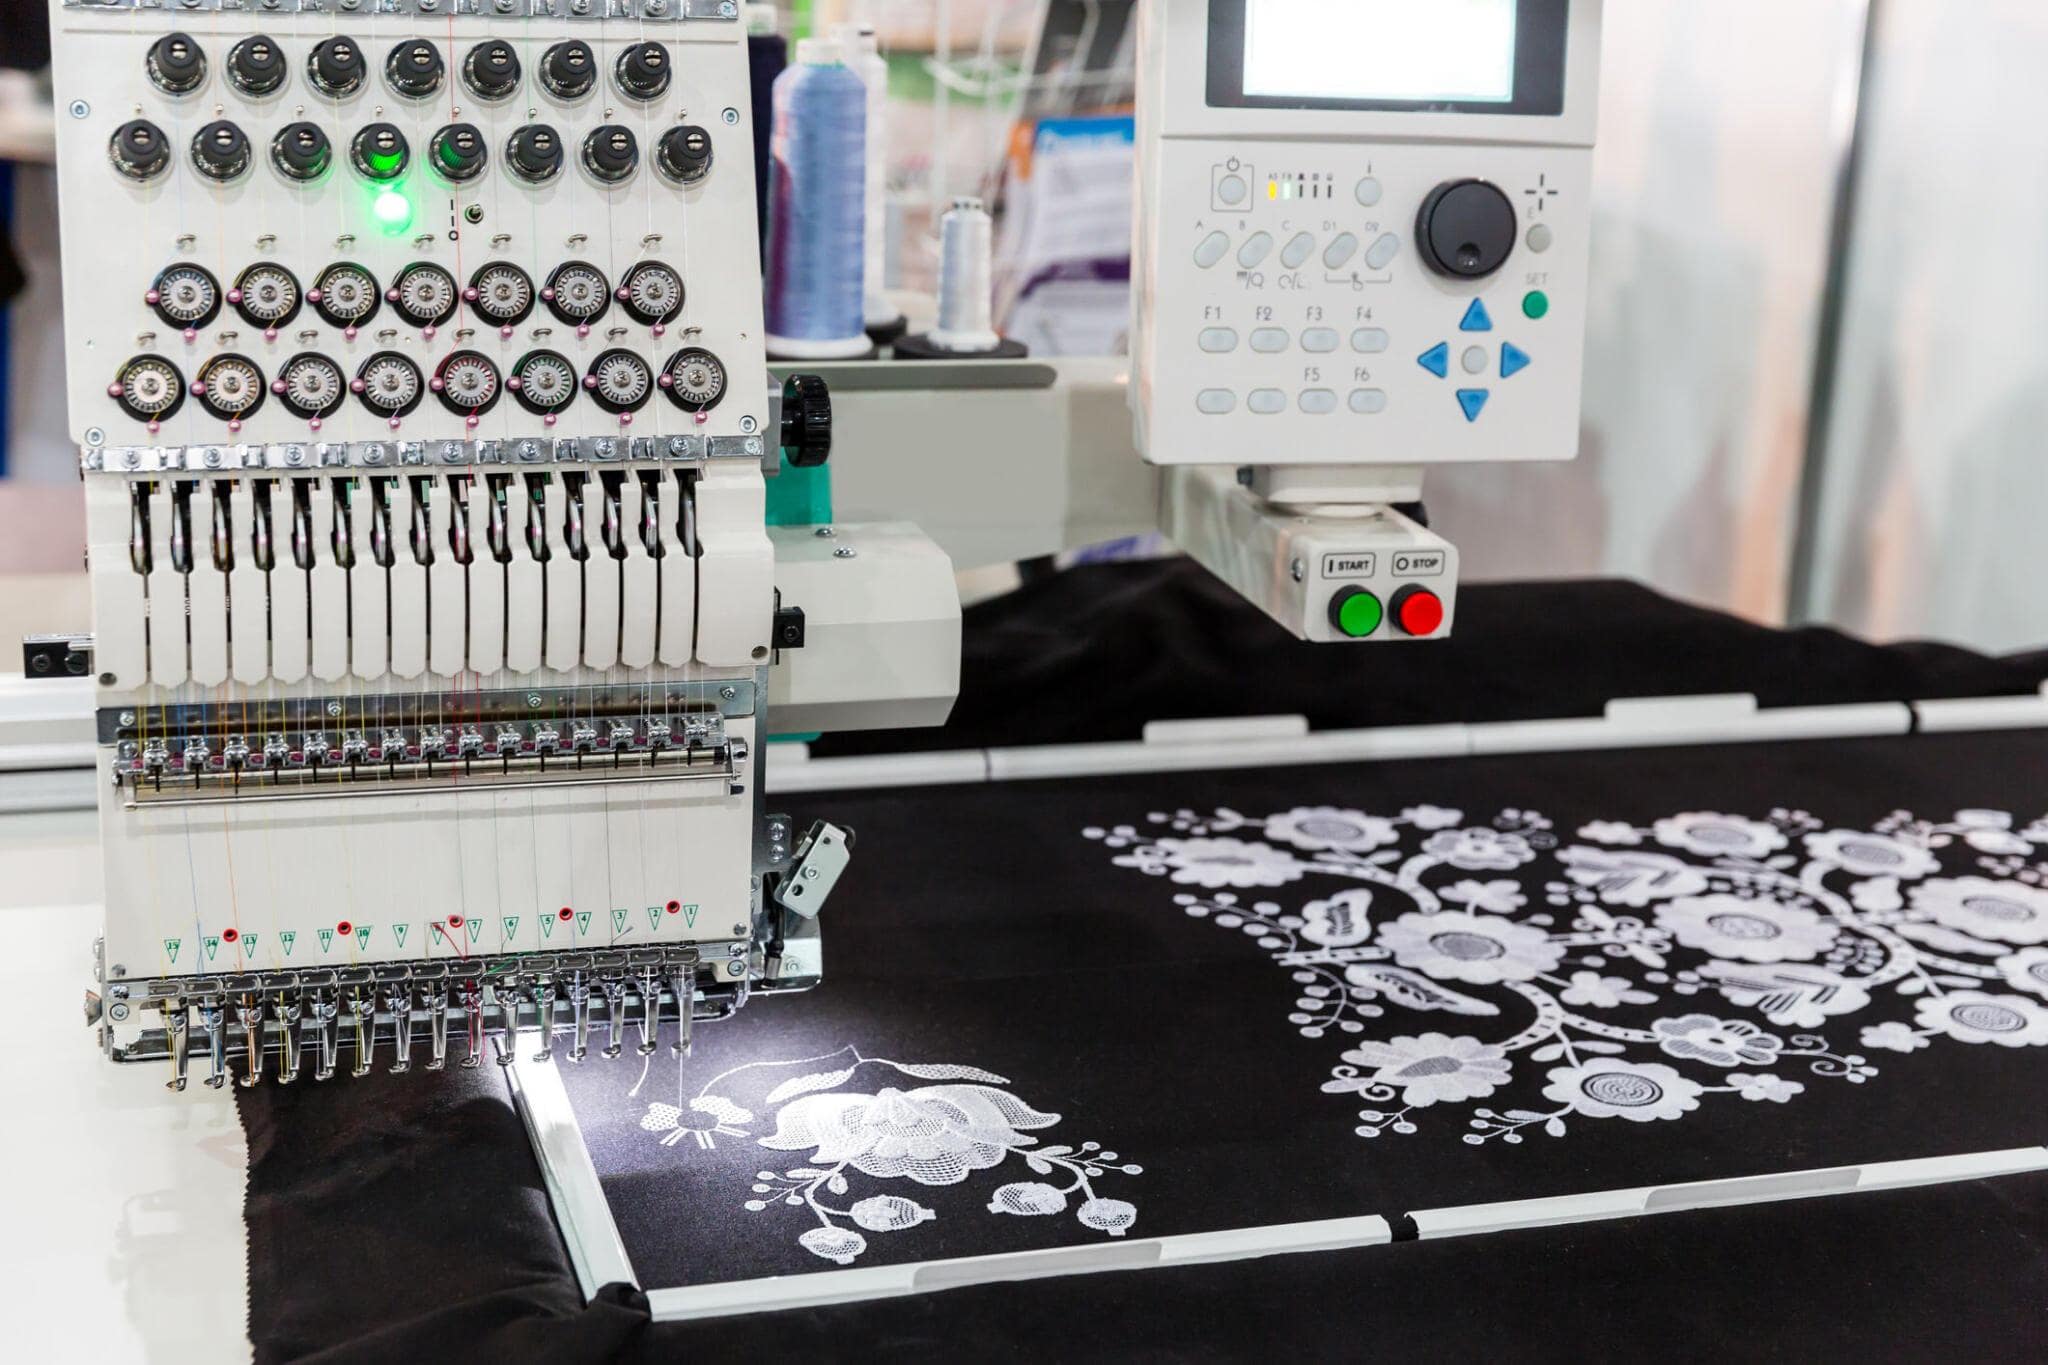
Multi needle embroidery machines are designed to enhance productivity and efficiency in the embroidery process. Unlike single-needle machines, which require the user to manually change the thread color after each section of stitching, Multi Needle Embroidery Machine can hold multiple threads simultaneously. This feature allows for seamless color changes and eliminates the need for constant manual intervention.
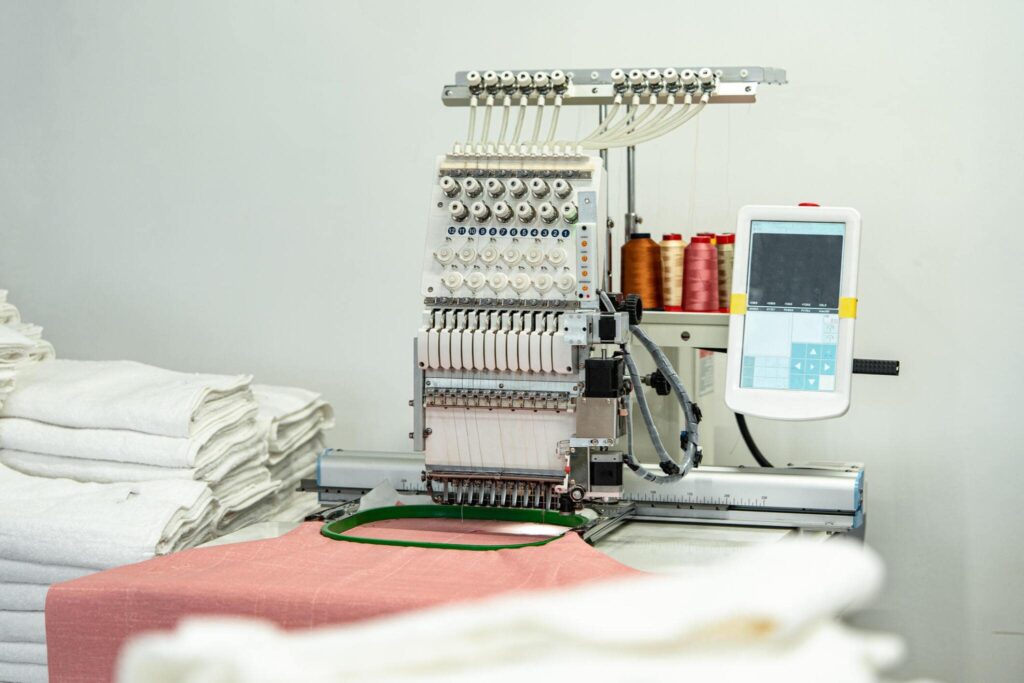
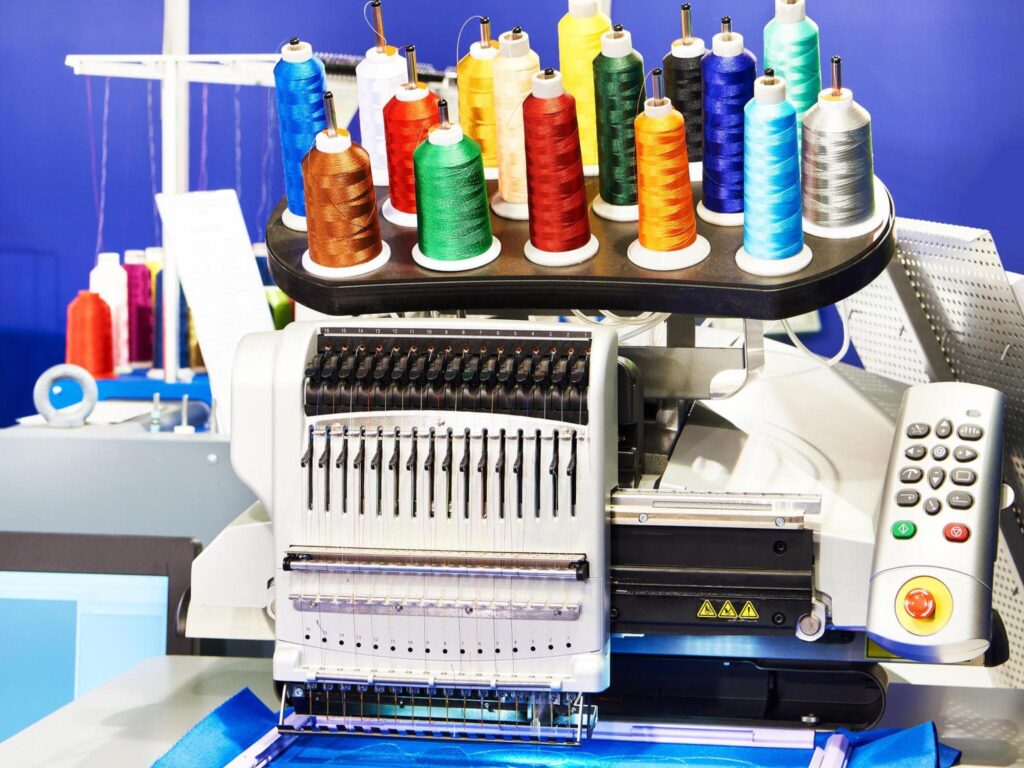
These machines typically come with multiple needle positions, ranging from two to more than ten. Each needle can be threaded with a different color, enabling intricate and vibrant designs without interrupting the embroidery process. Additionally, Multi Needle Embroidery Machine often have larger embroidery areas, allowing for the creation of larger designs in a single hooping.
The working principle of a Multi Needle Embroidery Machine involves the synchronized movement of the needles, the fabric, and the embroidery design. As the machine operates, the needles puncture the fabric at precise locations according to the digitized design. The machine’s control panel and software provide the necessary instructions for the needles to create intricate stitches and patterns.
Section 2: Machine Components and Setup
To operate a Multi Needle Embroidery Machine effectively, it is essential to familiarize yourself with its various components. These components include the machine head, control panel, bobbin case, and needles.
The machine head is the main body of the embroidery machine and houses the needle bars, thread guides, and tensioning mechanisms. The control panel, usually located on the side of the machine, allows you to input commands, adjust settings, and select embroidery designs. The bobbin case holds the bobbin, which provides the lower thread for stitching. Needles, as the name suggests, are responsible for piercing the fabric and forming the stitches.
Before starting the machine, ensure that it is correctly assembled and connected to a power source. Follow the manufacturer’s instructions for proper setup, including attaching the machine head securely to the stand, connecting any necessary peripherals (such as a computer or USB drive), and ensuring that the power supply is stable.
Section 3: Preparing the Fabric and Hooping
Preparing the fabric and hooping it correctly are crucial steps in achieving high-quality embroidery results. Start by selecting the appropriate fabric for your project, considering factors such as its weight, stability, and compatibility with embroidery techniques. Pre-wash and iron the fabric to remove any wrinkles or sizing agents that may affect the embroidery process.
Hooping refers to the process of securing the fabric in an embroidery hoop, ensuring that it remains taut and stable during stitching. Choose a hoop size that matches the design’s dimensions and attach the fabric securely, ensuring it is centered and aligned correctly. Tautness is key to maintaining consistent stitch quality, so adjust the fabric tension within the hoop as needed.
Section 4: Designing and Digitizing Embroidery Patterns
To create unique and detailed embroidery designs, you need to either design them from scratch or select pre-existing patterns. Design software, such as Adobe Illustrator or specialized embroidery software, can be used to create or modify designs. Alternatively, you can source embroidery patterns from online platforms or purchase them from embroidery design libraries.
Once you have your design, it needs to be digitized into a format compatible with the embroidery machine. Digitizing involves converting the design into a series of commands that the machine can interpret and stitch. Use dedicated embroidery digitizing software to assign stitch types, colors, and other parameters to different elements of the design. Save the digitized design in a format compatible with your machine, such as .DST or .PES.
Section 5: Setting Up the Machine for Embroidery
Before you begin embroidering, you need to set up the machine to accommodate your design and fabric. Select the appropriate hoop size that matches the design’s dimensions, ensuring there is enough clearance for the needles to move freely. Attach the hoop securely to the machine, following the manufacturer’s instructions.
Position the fabric within the hoop, ensuring it is centered and aligned with the design. Some machines have alignment options that allow you to precisely position the design on the fabric. Use these features to ensure accurate placement.
Section 6: Thread Selection and Threading
Thread selection plays a vital role in achieving the desired embroidery results. Consider factors such as thread weight, colorfastness, and compatibility with the fabric. It is advisable to use high-quality embroidery threads specifically designed for machine embroidery.
Threading a Multi Needle Embroidery Machine can seem complex at first, but with practice, it becomes easier. Start by referring to the machine’s manual for the correct threading path. Each needle has its own thread path, and it is crucial to thread them correctly to avoid thread breaks and tension issues. Follow the numbered guides or color-coded indicators on the machine to ensure accurate threading.
Section 7: Testing and Adjusting Voltage
Achieving proper tension is essential for producing clean and balanced stitches. Improper tension can result in loose or puckered stitches, thread breaks, or fabric distortion. Before starting the actual embroidery, perform a tension test on a scrap piece of fabric to ensure optimal results.
To test tension, select a portion of your design that contains different stitch types and densities. Stitch out this section and observe the results. If the stitches appear loose or puckered, you may need to increase the tension. If the stitches are too tight or causing the fabric to pull, you may need to reduce the tension.
Most multi needle embroidery machines have tension adjustment mechanisms for each needle. Refer to your machine’s manual for instructions on how to adjust the tension properly. Make small adjustments at a time and test again until you achieve the desired stitch quality.
Section 8: Starting the Embroidery Process
Once you have completed the setup and testing, you are ready to start the embroidery process. Double-check that the machine is properly threaded, the tension is adjusted correctly, and the design is positioned accurately on the fabric.
On the control panel, select the desired design from the available options. Some machines allow you to make additional adjustments, such as resizing or rotating the design. Take advantage of these features to customize your embroidery further.
Before initiating the embroidery, it is a good practice to run a “trace” or “outline” function. This feature allows you to visualize the design’s stitching path without actually stitching it on the fabric. Verify that the design is positioned correctly and that there are no overlaps or collisions between elements.
Once you are satisfied with the setup, press the start button to begin the embroidery process. Monitor the machine closely during the initial stitches to ensure everything is functioning correctly. If any issues arise, such as thread breaks or fabric shifting, stop the machine immediately and address the problem before continuing.
Section 9: Machine Maintenance and Troubleshooting
To keep your Multi Needle Embroidery Machine in optimal condition, regular maintenance is essential. Follow the manufacturer’s guidelines for cleaning and oiling the machine, as well as replacing needles and bobbin cases as needed. Proper maintenance helps prevent thread jams, needle breaks, and other performance issues.
Inevitably, you may encounter troubleshooting situations during the embroidery process. Some common issues include thread breaks, skipped stitches, or misaligned designs. When troubleshooting, refer to your machine’s manual for specific instructions or contact the manufacturer for assistance. Take note of any error codes or error messages displayed on the control panel, as they can provide valuable information for diagnosing and resolving issues.
Section 10: Tips for Successful Embroidery
To conclude this guide, here are some additional tips to enhance your Multi Needle Embroidery Machine experience:
- Always start with a clean and properly hooped fabric to achieve the best results.
- Use high-quality embroidery threads and replace them regularly to prevent thread breaks and inconsistent stitching.
- Experiment with different stabilizers to enhance the fabric’s stability and prevent puckering or distortion.
- Consider using a thread stand or thread tower for smoother thread feeding and improved tension control.
- Keep track of your machine’s maintenance schedule and perform regular cleaning and lubrication tasks.
- Take breaks during long embroidery sessions to prevent overheating of the machine and reduce the risk of thread breaks.
- Practice good thread management techniques, such as using thread nets or guides, to prevent tangling and ensure smooth thread flow.
- Invest in embroidery digitizing software to create custom designs and personalize your embroidery projects.
Conclusion:
To become proficient in a multi needle embroidery machine, it requires practice, patience, and attention to detail. With time and expertise, you will develop your own techniques and achieve stunning results with your multi-needle embroidery machine.
