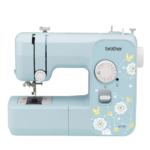
Threading a Brother sewing machine might seem challenging at first, especially for beginners, but it’s an essential skill that can transform your sewing experience. Mastering the art of threading ensures smooth operation, prevents common issues, and helps in achieving professional-quality stitches. This detailed guide will walk you through the entire threading process, from understanding the different machine parts to advanced techniques, so you can confidently thread your machine and start creating stunning projects.
Mastering the Art of Threading: A Step-by-Step Guide for Your Brother Sewing Machine
Why Proper Threading is Crucial
Proper threading isn’t just about getting the thread through the needle; it’s essential for stitch quality, fabric handling, and even machine maintenance. Incorrect threading can lead to issues like skipped stitches, tangled thread, or even damage to your machine over time. By learning the correct techniques, you’ll not only save time but also enhance your overall sewing precision. For more information, visit here.
Step 1: Familiarizing Yourself with Brother Sewing Machine Parts
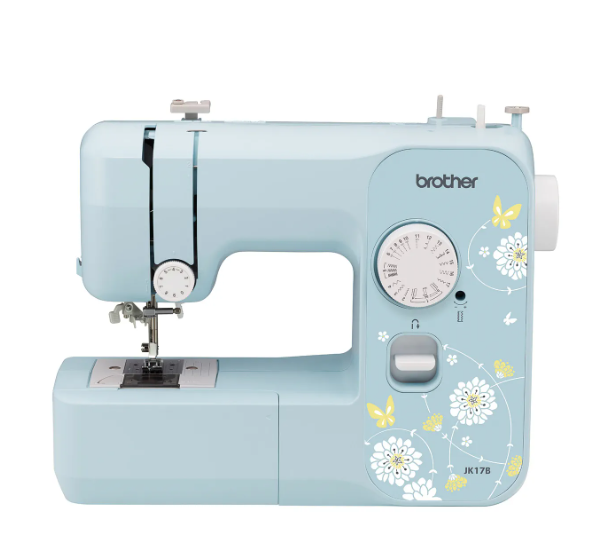
Understanding the key components of your Brother sewing machine is critical to threading it properly. Here’s a breakdown of essential parts:
- Spool Pin: Holds the thread spool securely.
- Thread Guide: Directs the thread towards the tension discs.
- Tension Discs: Ensure the upper thread has the correct tension for even stitching.
- Take-Up Lever: Moves with the needle, pulling the thread through the fabric.
- Needle: The sharp point responsible for passing the thread through the fabric to create stitches.
- Bobbin: Provides the lower thread that combines with the upper thread to form a stitch.
- Presser Foot: Holds the fabric in place as you sew.
Understanding these parts is the foundation for smooth threading and optimal machine performance.
Step 2: Preparing Your Brother Sewing Machine for Threading
Before you start threading, follow these steps to prepare your machine properly:
- Turn off the Machine: Always ensure your machine is powered off to avoid accidents.
- Raise the Needle: Manually rotate the handwheel towards you to raise the needle to its highest position.
- Lift the Presser Foot: This helps release the thread tension, making threading easier.
- Remove the Bobbin: Take out the bobbin if it’s already in the case to check for leftover thread or tangles.
Step 3: Threading the Upper Thread
Proper threading of the upper thread ensures smooth stitching. Here’s a simple step-by-step method:
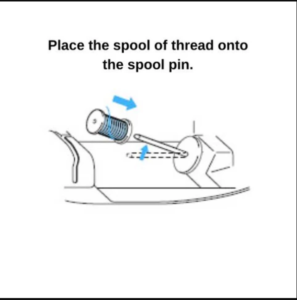
- Place the Spool: Place the thread spool on the spool pin, ensuring it’s positioned correctly (horizontal or vertical, depending on your model).
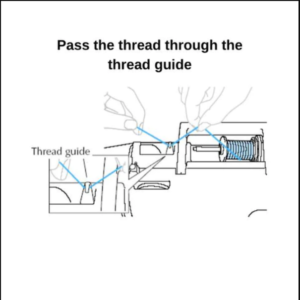
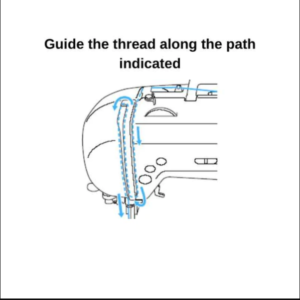
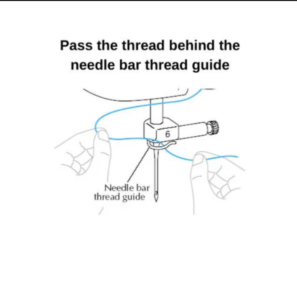
- Guide the Thread: Pull the thread through the upper thread guide, leading it down towards the tension discs.
- Pass Through the Tension Discs: Make sure the thread passes between the tension discs. This ensures proper tension during stitching.
- Take-Up Lever: Pull the thread through the take-up lever, which moves up and down as the needle moves.
- Thread the Needle: Finally, pass the thread through the eye of the needle, moving from front to back.
Many Brother models feature an automatic needle threader that can simplify this step. Use this feature if your machine has it to save time and reduce eye strain.
Step 4: Winding and Inserting the Bobbin
The bobbin supplies the lower thread, so proper winding and insertion are essential:
- Wind the Bobbin: Place the thread spool on the pin and wind the thread around the bobbin a few times manually before starting the machine to wind it fully.
- Insert the Bobbin: Open the bobbin case and insert the bobbin, making sure it rotates in the correct direction (usually clockwise).
- Thread the Bobbin Case: Pull the bobbin thread through the slit in the bobbin case and guide it under the tension spring.
- Close the Bobbin Case: Ensure the bobbin case is securely closed, and pull the bobbin thread up through the needle plate.
Step 5: Adjusting Tension for Optimal Stitching
Correct tension is key to ensuring your stitches are even and strong. Follow these steps:
- Locate the Tension Dial: The tension dial is usually on the front of your Brother machine.
- Test Your Settings: Run a test on a fabric scrap to check stitch quality. If the stitches are loose or puckered, adjust the dial gradually.
- Match Tension to Fabric: For lightweight fabrics like cotton or silk, a lower tension is ideal. For thicker materials like denim, increase the tension.
Proper tension ensures that both the upper and lower threads are balanced, preventing uneven or skipped stitches.
Step 6: Troubleshooting Common Threading Issues
Despite following proper steps, threading problems may still arise. Here are common issues and how to fix them:
- Skipped Stitches: This could be due to improper threading or an incorrectly installed needle. Double-check the threading and make sure the needle is the right size for the fabric.
- Thread Breakage: If your thread frequently breaks, the problem could be with the quality of the thread, incorrect tension, or a damaged needle. Check all these factors to resolve the issue.
- Loose Stitches: Often caused by incorrect tension or an improperly seated bobbin. Readjust the tension or re-thread the bobbin if necessary.
Step 7: Maintenance and Care for Your Brother Sewing Machine
Routine maintenance keeps your machine running smoothly. Here’s how to care for it:
- Clean Regularly: Remove lint and dust from the bobbin case, needle area, and other parts of the machine. A small brush or vacuum attachment can help.
- Oil the Machine: Check your manual for oiling instructions. Regular oiling prevents parts from wearing down and keeps everything running smoothly.
- Change Needles Often: Worn or bent needles can cause threading issues and damage fabrics. Change your needle regularly to maintain stitch quality.
Step 8: Advanced Threading Techniques for Special Stitches
Once you’ve mastered basic threading, you can experiment with advanced techniques for decorative and functional stitches:
- Twin Needle Threading: Use two needles and two threads to create parallel, professional-looking stitches. This technique is perfect for hems or decorative topstitching.
- Thread Painting: Create intricate designs using different colored threads. By adjusting the tension and using free-motion stitching, you can paint on fabric with thread.
- Elastic Stitching: If you work with stretchy fabrics, the elastic stitch option available on many Brother machines ensures your seams will flex without breaking.
Conclusion: Unlock the Full Potential of Your Brother Sewing Machine
Mastering the art of threading your Brother sewing machine is the key to unlocking a world of creative possibilities. By understanding the different parts of the machine, following a step-by-step threading process, and fine-tuning tension settings, you can avoid common issues and achieve flawless results. Regular maintenance and exploring advanced techniques will not only enhance your sewing projects but also prolong the life of your machine. Whether you’re a beginner or an expert, proper threading ensures your Brother sewing machine will be a reliable companion for all your creative endeavors.
With practice, you’ll find threading your Brother sewing machine becomes second nature, allowing you to focus more on the art of sewing and less on technical difficulties. Happy sewing!
