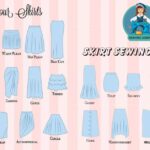

Introducing the art of sewing—a skill that empowers you to transform imperfections into masterpieces! Have you ever found yourself confronted with a pesky hole in your favorite garment, wondering how to salvage it? Look no further! We’re here to guide you through the artful process of how to sew a hole, unlocking a world of creativity and resourcefulness.
Sewing is not just a practical solution; it’s an opportunity to infuse your personal touch and make your clothes truly one-of-a-kind. Imagine the satisfaction of rescuing a beloved item from the brink of disposal and breathing new life into it with your own hands. With a few simple tools and a pinch of patience, you can become a mender of fashion, a guardian of memories, and a creator of uniqueness.
The process begins with assessing the hole—its size, shape, and location. Armed with this knowledge, you’ll gather your materials: a needle, thread, scissors, and fabric that matches your garment. As you thread the needle, you’ll feel a surge of anticipation. Each stitch will be a testament to your ingenuity and skill.
Carefully align the fabric edges around the hole, ensuring a seamless fit. With deftness and precision, you’ll embark on an intricate dance between the needle and thread, weaving them in and out, and binding the fibers together. As the hole closes, your confidence will grow, and you’ll discover the therapeutic rhythm of the needle’s gentle motion.
With each completed stitch, you’ll witness the transformation—a hole blossoming into a beautifully repaired patch. Your creation will be a testimony to your resourcefulness, creativity, and dedication to sustainability—a testament to the power of your hands.
How to sew a hole with latest sewing machines
In this detailed guide, we will walk you through the step-by-step process of sew a hole using the latest sewing machines. We will cover various techniques, provide helpful tips, and address frequently asked questions to ensure your success. So, let’s get started! For more information, visit here.
Table of Contents
I. Understanding the Tools and Materials
Before diving into the sewing process, it’s important to familiarize yourself with the tools and materials you’ll need:
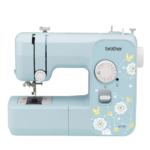
Sewing Machine Types:
Mechanical Sewing Machines
Computerized Sewing Machines
Serger Machines
Essential sewing accessories:
Needles: Appropriate sizes and types
Thread: Matching color and weight
Scissors: Sharp and suitable for fabric
Seam ripper: For removing stitches if needed
Pins and pincushion: For securing fabric in place
Iron and ironing board: To press fabric
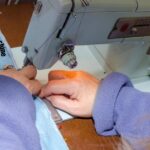
II. Preparing the Fabric and Machine
Proper preparation ensures smooth sewing and optimal results. Follow these steps:
Clean and oil the sewing machine:
Remove lint and debris
Lubricate moving parts
Choose the Right Needle and Thread:
Select a needle suitable for the fabric type
Use a thread that matches the fabric color and weight
Prepare the fabric:
Wash, dry, and iron the fabric
Cut any loose threads around the hole
Reinforce frayed edges with fabric glue or fray check

III. Techniques for Sew a Hole
Now that your tools and fabric are ready, it’s time to sew a hole using your sewing machine. Here are three common techniques:
Patching Technique:
Cut a patch larger than the hole from a matching fabric
Pin the patch over the hole, aligning the edges
Use a straight stitch or zigzag stitch to secure the patch
Darning Technique:
Select a thread that matches the fabric color
Place a stabilizing material under the hole
Use a darning foot or free-motion foot to sew over the hole in a zigzag or back-and-forth motion
Invisible Mending Technique:
Choose a thread that matches the fabric color
Align the edges of the hole and pin them together
Use a fine, straight stitch to sew along the edges, making sure to catch both sides of the fabric
IV. Tips for Successful Hole Sewing
Take your time: Sew a hole requires precision, so it’s important to work slowly and carefully. Hurrying can result in crooked stitches and errors.
Practice on scrap fabric: If you’re new to sewing or trying a new technique, it’s helpful to practice on scrap fabric before working on your actual garment. This allows you to familiarize yourself with the process and adjust your settings if needed.
Test stitch length and tension: When you begin to sew a hole, test different stitch lengths and tensions on a fabric scrap. This helps you determine the ideal settings for your specific fabric and achieve smooth and even stitches.
Use the right foot attachment: Depending on the technique you’re using, you may need to switch to a specific foot attachment on your sewing machine. For example, a darning foot or free-motion foot is ideal for the darning technique.
Backstitch for durability: To ensure the stitches hold up over time, always begin and end your sewing with a few backstitches. This reinforces the seam and prevents it from unraveling.
Trim excess threads: After sew a hole, trim any excess threads to give your repair a neat and finished appearance. Be careful not to cut any stitches in the process.
V. Troubleshooting Common Issues
Skipped stitches: If you notice skipped stitches while sew a hole, it may be due to a dull or damaged needle. Replace the needle and try again. Adjusting the tension or using a different needle size can also help.
Uneven stitches: Uneven stitches can occur if the fabric is not properly aligned or if there is tension imbalance. Ensure the fabric is flat and taut while sewing. If required, adjust your sewing machine’s tension settings.
Bobbin thread showing on the top: If you notice the bobbin thread appearing on the top side of your stitches, check if the bobbin is correctly inserted. Adjust the tension settings or rethread the machine if needed.
Fabric puckering: Puckering can happen if the fabric is too tightly pulled or if the tension is too high. Make sure to hold the fabric taut but not overly stretched while sewing. Adjust the tension settings accordingly.

VI. Creative Ideas for Embellishing Repairs
Sewing a hole doesn’t have to be purely functional—it can also be an opportunity for creativity! Consider these ideas to add a unique touch to your repairs:
Embroidery: Use decorative embroidery stitches to embellish the repaired area. You can create intricate patterns or add colorful accents to make the repair stand out.
Appliqué: Instead of using a plain fabric patch, experiment with appliqué techniques. Cut out interesting shapes or designs from contrasting fabric and attach them over the hole using your sewing machine.
Fabric paints and markers: Add a touch of color to your repair by using fabric paints or markers. You can create patterns, draw designs, or even paint a small picture over the repaired area.
Visible mending: Embrace the concept of visible mending, where the repair becomes a visible part of the garment’s design. Use contrasting thread or decorative stitches to highlight the repaired area, turning it into a unique feature.
VII. Frequently Asked Questions (FAQs)
Here are some common questions people have when sewing a hole with a sewing machine:
Can I sew a hole without a sewing machine?
Yes, you can hand sew a hole using similar techniques, but a sewing machine provides more precision and efficiency.
What type of stitch should I use?
The type of stitch depends on the fabric and desired outcome. Straight stitches and zigzag stitches are commonly used.
How can I keep the fabric from gathering together?
Ensure the fabric is properly aligned and use pins to hold it in place. Also, adjust the tension and presser foot pressure on your sewing machine.
How do I fix skipped stitches?
Check the needle for damage or dullness. Replace it if necessary. Adjusting the tension and using the correct needle size can also help.
Conclusion:
Sewing a hole using the latest sewing machines is a simple yet essential skill for every seamstress. With the right tools, materials, and techniques, you can restore your garments and prolong their lifespan. By following this detailed guide, you’ll be able to sew a hole with confidence and achieve professional-looking results. So, grab your sewing machine, gather your supplies, and start sewing!